Cancelled last year, the event returns and is looking to make up for lost time.
The post Good Beer Week’s tenth anniversary program appeared first on Beer & Brewer.
Cancelled last year, the event returns and is looking to make up for lost time.
The post Good Beer Week’s tenth anniversary program appeared first on Beer & Brewer.
Sydney brewery release Azacca – the latest in their series of single hop IPAs.
The post Akasha continue their worship of hops appeared first on Beer & Brewer.
Brian Castledine wins for his take on Hop Nation’s Candyland Milkshake Hazy.
The post The winner of our craft beer review competition appeared first on Beer & Brewer.
Tasmania’s Van Dieman Brewing is holding its annual hop picking day this Saturday.
The post Get a hands on approach to making beer appeared first on Beer & Brewer.
Deeds Brewing release three hazies including one exclusively with Beer Cartel.
The post The good Deeds continue with three more hazies appeared first on Beer & Brewer.
Sydney Brewery’s Pilsner wins best in show at Queensland’s top beer awards.
The post The secret to the success of the quiet achievers appeared first on Beer & Brewer.
Frenchies Bistro & Brewery release three new IPAs plus we revisit some old favourites.
The post French flair for the classics and the contemporary appeared first on Beer & Brewer.
Sydney brewery’s expansion includes new tanks, canning line and dedicated barrel room.
The post Wayward to increase capacity by 25 per cent appeared first on Beer & Brewer.
New Zealand-Style Pale Ale and India Pale Ale added to BA’s style guidelines.
The post New Zealand Pale Ales added to style guide appeared first on Beer & Brewer.
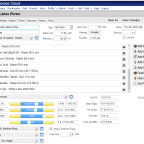 I felt it was time to bring you up to date on some of the new things happening at BeerSmith. BeerSmith Web Version I’ve been working hard to build a complete web based version of BeerSmith 3. Last year I released most of the BeerSmith tools to Gold+ members on the BeerSmithRecipes.com web site along […]
 New Kiwi hop receives its highest profile Australian release since being officially named.
The post Nectaron’s nectar shines in 4 Pines release appeared first on Beer & Brewer.
Mordialloc brewery kick off the new year in style with limited hazy IPA release.
The post Wolf of the Willows’ debut 2021 release appeared first on Beer & Brewer.
Much-loved hop harvest celebration returns in March after being cancelled in 2020.
The post Beechworth’s High Country Hop returns appeared first on Beer & Brewer.
 Mathias Siebler, a 10th generation German hop farmer, joins me this week from Bavaria to discuss growing hops. Subscribe on iTunes to Audio version or Video version or Spotify or Google Play Download the MP3 File– Right Click and Save As to download this mp3 file. Your browser does not support the audio element. Topics […]
 Brewpubs boost flavor on their menus by pouring their beers into the pizza dough and serving up the perfect slice.
The post Beer-infused Pizza Dough is a Perfect Brewpub Pairing appeared first on CraftBeer.com.
These classic Christmas beers from craft breweries pair perfectly whether you’re looking to share a bottle with friends or enjoy as you’re decorating the house for the holidays.
The post 12 Beers of Christmas appeared first on CraftBeer.com.
The holidays are an opportunity to combine your favorite beer styles with your favorite foods. Here is some simple holiday beer pairing advice.
The post Simple Holiday Beer and Food Pairings appeared first on CraftBeer.com.
Festive Day Features Special Veterans Day IPA Release with Yakima Chiefs Veterans Blend, Special Commemorative Glass, and Marine’s Cake-cutting Ceremony WAYNESBORO, VA – (November 2, 2020) – Central Virginia’s Stable Craft Brewing at Hermitage Hill, an authentic working farm brewery and winery, will honor the special men and women who serve our country, with a special Veteran’s […]
The post Stable Craft Brewing At Hermitage Hill Salutes Our Veterans With Special Veteran’s Day Celebration On Sunday, November 8 appeared first on CraftBeer.com.
Fall is in the air and that means one thing: harvest season! Brewing with fresh hops is a meticulous process, having to rely on bountiful bines and timing of wet hops plucked, packaged, and shipped overnight via air freight to align with a brew day built around the arrival of those hops and those hops alone…and this […]
The post Virginia Beer Co. Celebrates Harvest Season With Two Wet-Hopped Recipes appeared first on CraftBeer.com.
Stan Hieronymus joins me this week to discuss hop breeding programs and some of the new hop varieties hitting the brewing market. Subscribe on iTunes to Audio version or Video version or Spotify or Google Play Download the MP3 File– Right Click and Save As to download this mp3 file. Your browser does not support […] Jamil Zainasheff from Heretic Brewing joins me this week for a beer brewing question and answer session. Subscribe on iTunes to Audio version or Video version or Spotify or Google Play Download the MP3 File– Right Click and Save As to download this mp3 file. Your browser does not support the audio element. Topics in […] Randy Mosher joins me this week to discuss brewing fruity IPAs and using fruit in your IPAs. Subscribe on iTunes to Audio version or Video version or Spotify or Google Play Download the MP3 File– Right Click and Save As to download this mp3 file. Your browser does not support the audio element. Topics in […]  I recently posted both yeast and hops updates for BeerSmith 3 and BeerSmith 2 to the add-ons server in BeerSmith. These are recommended downloads for BeerSmith users. These add-ons update the core yeast and hops listings to include new yeasts such as Kveik as well as some 63 new hop varieties. To download these updates, […]
  Today I’m going to highlight some of the new dry hop features in BeerSmith 3.1. BeerSmith 3.1 was released in mid-2020. Dry hopping is one of the best ways to preserve aroma oils in your hops. Because it is done at low temperature, you don’t risk boiling off volatile aroma oils. Also the long contact […] I’m happy to announce the official release of the BeerSmith 3.1 update. This update includes some significant updates to the BeerSmith data storage model, TILT data import, new brewing features and a large number of bug fixes. This release is also a very important foundational step towards establishing both an online version of BeerSmith and […]
  Buy BeerSmith 3 Download BeerSmith 3 Here is a summary of the new features coming in the BeerSmith 3.1 desktop update. I have posted the open beta version on the main download page at BeerSmith.com, and plan to publish the formal release in the next week or two. You can find additional details for all […] Denny Conn and Drew Beechum join me this week to discuss hop techniques and brewing beers with unusual specialty ingredients. Subscribe on iTunes to Audio version or Video version or Spotify or Google Play Download the MP3 File– Right Click and Save As to download this mp3 file. Your browser does not support the audio […] Ron Pattinson joins me to discuss his upcoming book on British beer brewing during World War II. Ron has done extensive research on how commercial beer production and recipes evolved during the war. Subscribe on iTunes to Audio version or Video version or on Google Play Download the MP3 File– Right Click and Save As […]


