additions

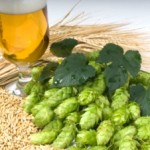
This July marks five years since I left my day job with the federal government to brew full-time. We filled our first barrel with mixed-fermentation saison before opening the tasting room at Sapwood Cellars. Since then, we are up to 80 oak barrels with a dedicated suite for mixed-fermentation. So, I thought it would be a good time to sit down and reflect on the lessons that Scott and I have learned over the years! The things we got right, the things we got wrong, and where we are going from here!

Luckily, we've had a pretty good run so far! We've cultivated a great group of supporters in our Wood Club. Neologism (gin-barrel-aged Cascade/Simcoe Cryo dry-hopped pale sour) was named one of Craft Beer & Brewing's Top-20 beers of 2022 by way of winning a massive blind tasting. Despite the pandemic we've been able to modestly expand (production, staff, and space)! We're even shipping beers around the US through Tavour!

I recently realized that Google discontinued Feedburner in 2021... which is why you haven't gotten an email from me in a while. I've changed The Mad Fermentationist over to a new email service, so if you've signed up you should get emails for new posts going forward! If you want more emails from me, I write the near-weekly Sapwood Newsletter (with details on new beers often including info on ingredients, process, and equipment)!


The Things We Got Right

Diverse Microflora - It is certainly simpler to have a single "house" culture. It allows for relatively worry-free blending, but doesn't leave as much room for unique flavors. Maintaining multiple cultures, we have to worry about the microbes from one barrel over-attenuating in the bottle if they are more attenuative than others in the blend. However, the variety of flavors expressed and the options for blending is worth the effort at our scale. We've been even happier since we started selecting our favorite barrels and using them to inoculate subsequent batches. Now we can select which character fits a pale sour vs. a sour red. 

Last week we blended our second batch of Growth Rings (three year blend). To ensure all the microbes have time to get to know each other, we blended the four barrels (all different pale base beers) into a tote. They'll sit there for a couple months to ensure the gravity is stable before priming and bottling. 


Balancing Planning and Creativity - We started 2023 with a rough timeline of the 20 or so barrel-aged mixed-ferm we'll release. However, when we fill barrels there generally isn't a specific plan for which barrel will be in which beer. Pale, wine-barrel-aged beer can be delightful on it's own, or serve as a great base of fruit, herbs, or dry hopping. When we taste them, we get to decide what will make the best possible beer. However, it's also nice to have unique bases/barrels earmarked for a particular purpose. Some examples of those include Opulence (sour red with dried sour cherries in the bourbon and red wine barrels), a Brett'd Belgian Tripel in Calvados (apple brandy), or Port barrels for There Are No Edges (Vin de Céréale).
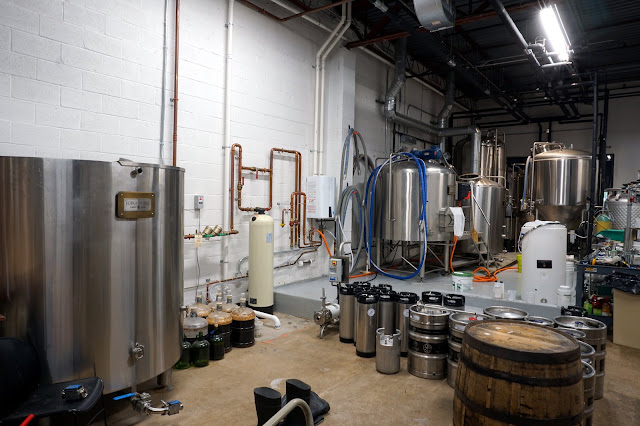


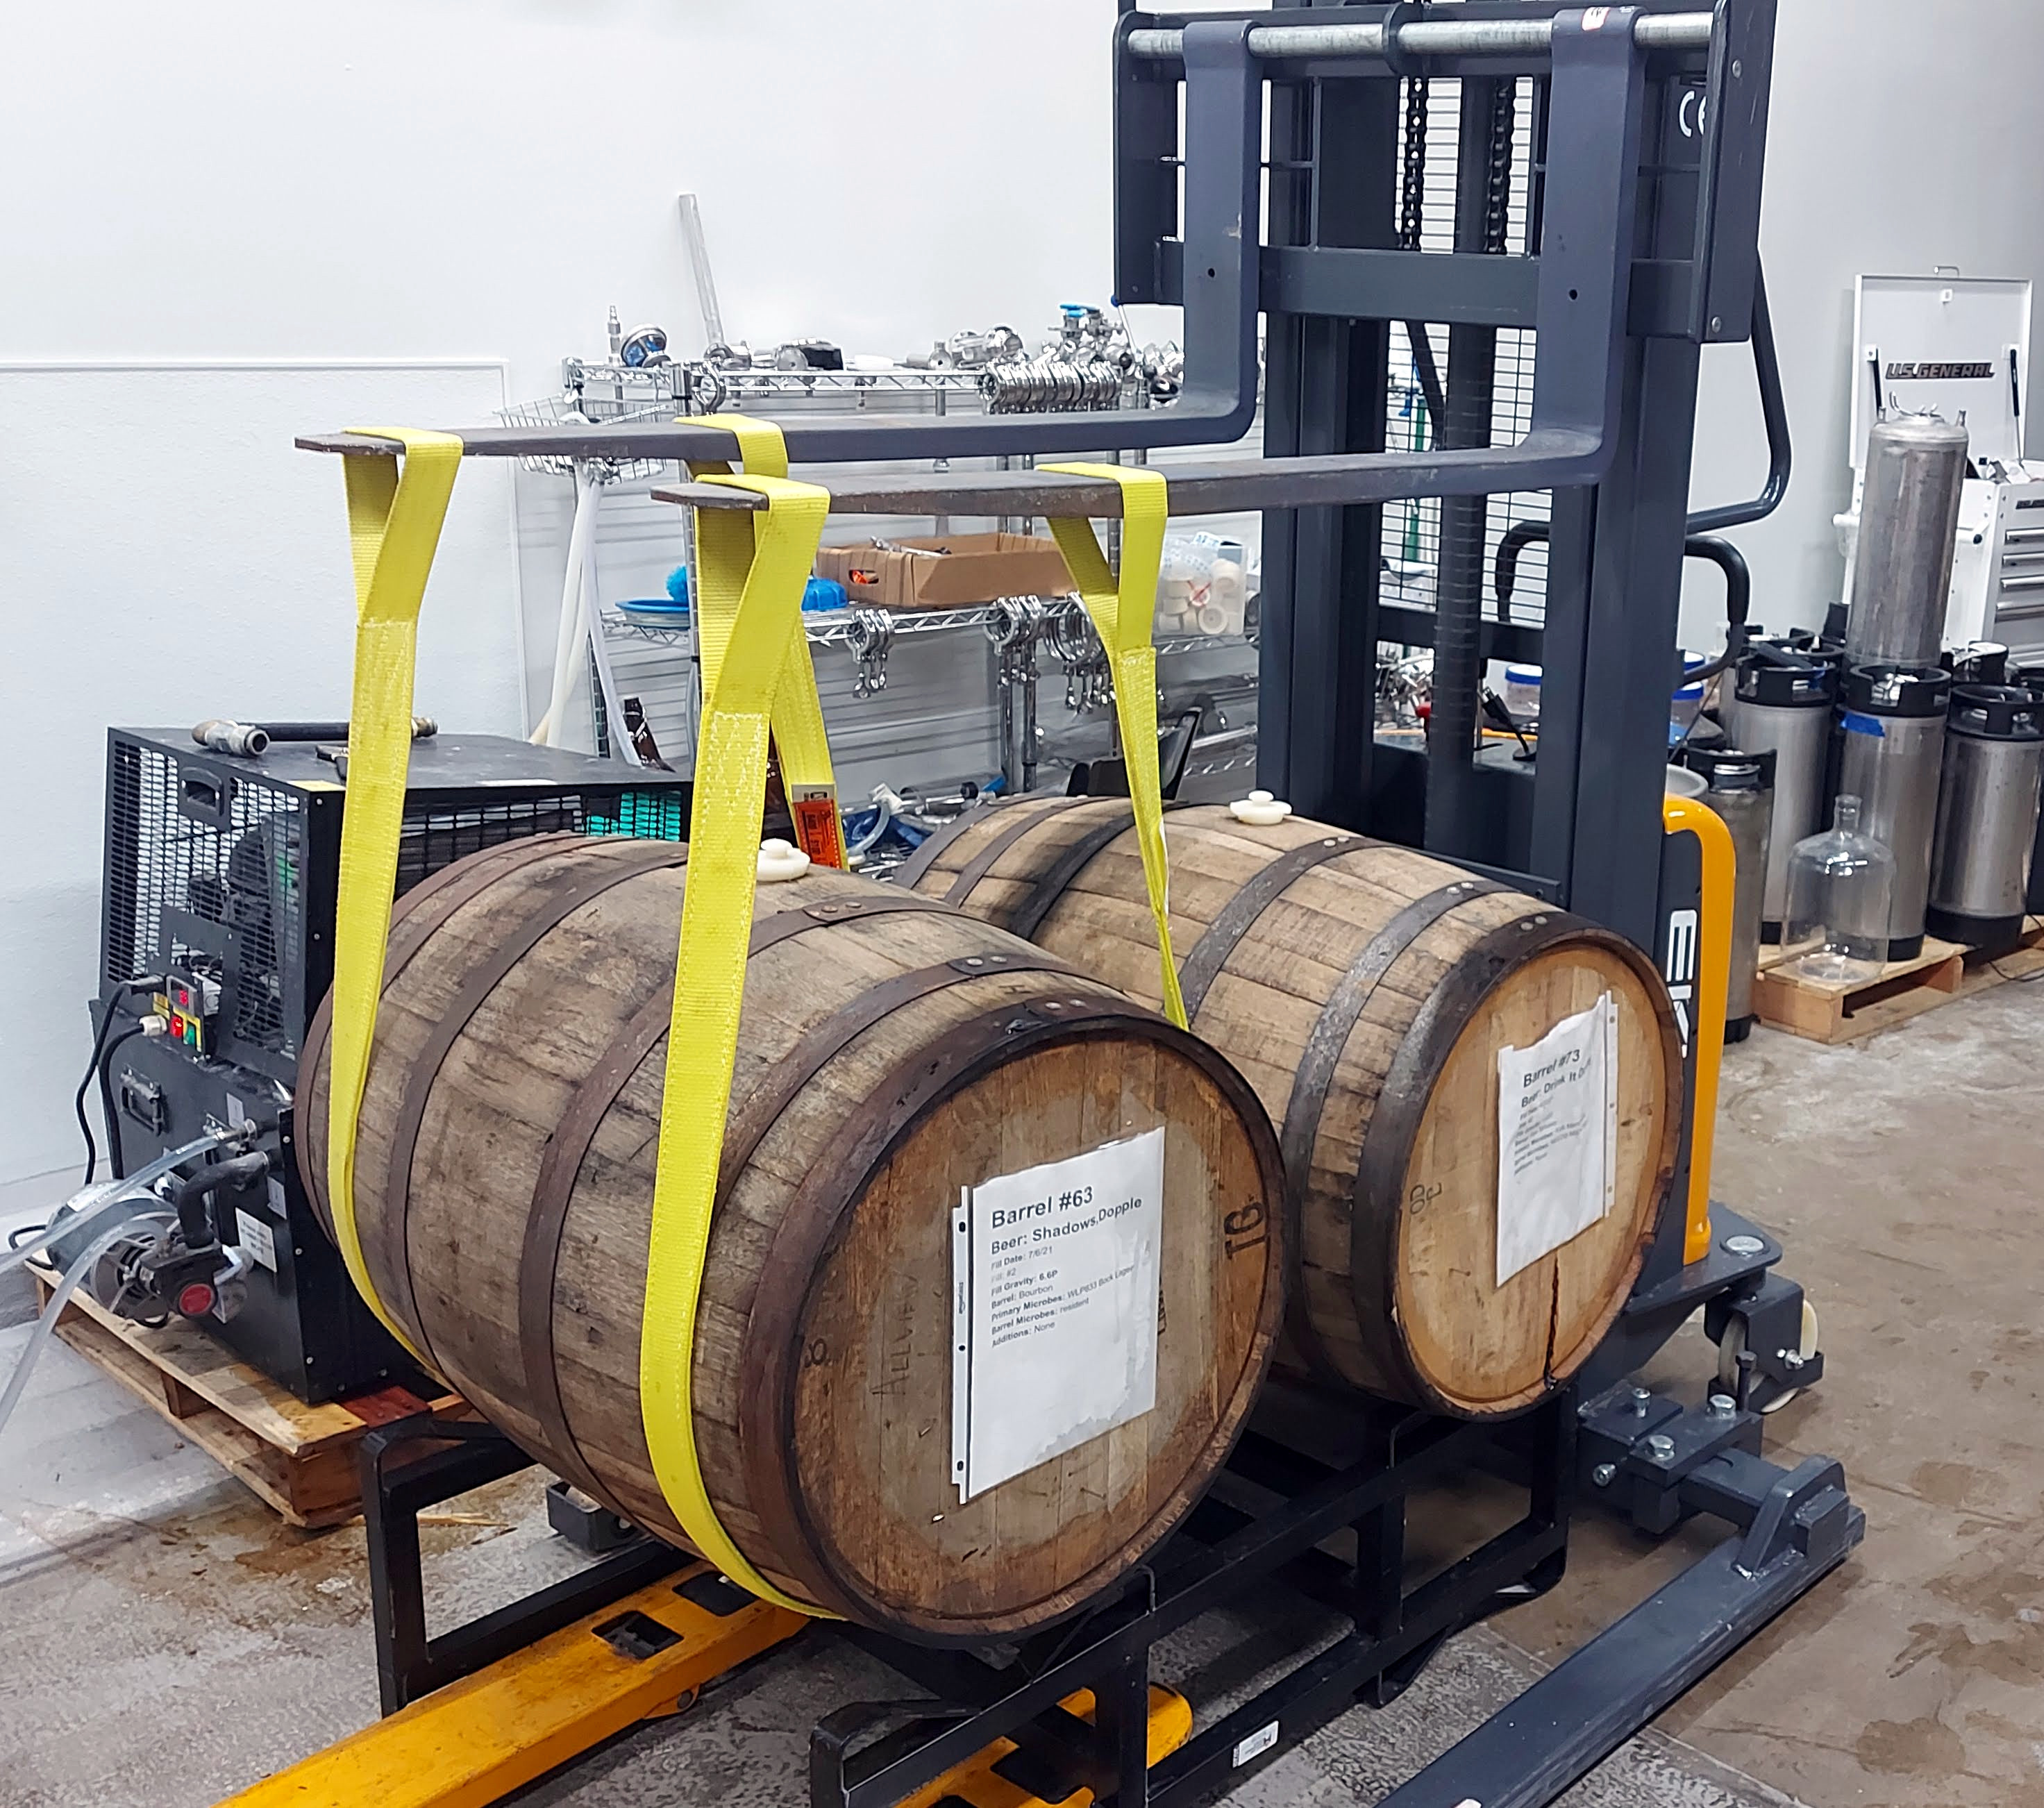
Tracking Barrels - Using Google Sheets has worked out well for us. I can sort based on fill date, final gravity, base beer etc. It allows me to sit on my couch at home and look at what beers we have in need of fruit, blending, packaging etc. Barrels still fall through the cracks (nothing is more heartbreaking than tasting a barrel that is old/stale and seeing a note about how good it was six months ago). Sometimes a beer is delicious, it just doesn't fit into a blend.


Blending with Others - Whether it is our tasting room manager (Spencer), Lead Brewer (Ken), homebrewing friends, fellow brewers (e.g., the brewers from Other Half for a collab) etc. Tasting barrels with other people helps improve your palate, riff on ideas, and make more broadly appealing results. We all have flavor "blind spots" and it is a good idea to have other people looking too. It's fun to riff off other people's ideas and come up with flavor combinations that neither of you would have made on your own. 


Packaging - Our general approach to packaging has been a big success... once we started measuring the dissolved CO2 in the beer rather than relying on time/temperature/pressure. We blend barrels or transfer fruited beers to our blending tank and cold crash. The day before bottling we'll push in sugar (boiled in water) along with Premier Cuvee champagne yeast (rehydrated with a small amount of Start-Up/GoFerm nutrient). We then carbonate the beer to ~2 vol of CO2, with the sugar and yeast taking the beer the rest of the way. We fill on a bottler (XpressFill) that purges and counter-pressure fills. So far it's resulted in relatively quick/clean refermentations with reliable carbonation. 


The Things We Got Wrong

Not Allocating Time - It is easy to put-off barrel-aged beers for more pressing concerns. When there are DIPAs to dry hop, Pilsners to can, and excises taxes to exercise the sour beers are often pushed to the side. It's rare that a week or two of aging in one direction or another makes a dramatic difference... but it's hard to get the most out of a barrel program if it is always at the bottom of the priority list. We're getting better at it, but I still wish from the start I'd blocked off a specific time/day each week to taste barrels, trial blends, source ingredients, prop microbes etc. 


Over-Correcting - Initially we weren't getting enough acidity in some of our beers, so we started pulling levers... colder rinsing barrels, lower hopping rates etc. Then our beers started becoming too sour, so we started veering back in the other direction. Managing a barrel program is like driving a cruise ship, it is difficult to pivot quickly! It's difficult to step back and tell if there is something causing one specific batch from being too sour (or not sour enough) or if there is a systemic issue. 

I think we would have been well served to do a better mix starting early (some barrels cold or no-rise, more with just Brett etc.). This would have given us more options when it came to blending over- or under-soured beers. 


Appreciating the Impact of Fruit On Acidity - Early on to help out some of those under-acidified beers, we went onto fruit. I was surprised how little additional acidity they picked up from refermentation. Sure adding a really acidic fruit (e.g., black currants for Fellow Feeling) contributed acidity, but just refermenting on wine grapes or peaches did not. However, as our cultures "matured" we suddenly had beers dropping from a tart pH of 3.5 to an obnoxiously-acidic 3.0 after going onto the fruit (2.8 pH was the lowest I measured). That's despite pitching rehydrated wine yeast to ensure a healthy and quick refermentation. 

I thought maybe our resident lactic acid bacteria were becoming more hop tolerant, and the dilution of the beer with fruit was allowing them to kick into action. To test this we began adding a small amount of hop extract with the fruit (we use a 20% alpha extract from Hopsteiner). Our fruited beers stopped dropping pH nearly as much, and as an added benefit the head retention improved considerably. 


Hot Side Hopping - I didn't appreciate how much of the classic funky lambic/saison profile originates with the hops. While we've always used a "restrained" dose of aged hops at the start of the boil (~.5 lbs/bbl), that just wasn't enough to give the beers the aromatic depth I was looking for. Recently we've been experimenting with a similar size whirlpool addition of cold-stored hops. So far the results are promising! I should have noticed that many of my favorite homebrewed Brett Saisons had big whirlpool additions and/or dry hopping... but those were all relatively quick turn-around and not barrel-aged. I'm glad Scott and Ken pushed to age some of our pale ales (pre-dry hopping) in barrels, an idea I wasn't excited about... but the results have been really delicious!

Where We Are Headed

Barrel-aged sour beer seems to be a wide/shallow market at the moment. The people who love them are still searching them out, but the average beer drinker seems to have moved on to less "challenging" more "reliable" styles. It's hard to know how much the rapid expansion of the segment played into this loss of interest. I've heard of quite a few breweries down-sizing or eliminating barrel-aged sour beers... Luckily we still have 150 people in our Wood Club, which is a great way for us to get these beers into the hands of our biggest supporters and a base-level of sales for eight releases a year. We're aiming to make our mixed-ferm beers more "delicious" the sorts of beers that people want to drink a whole bottle of, not just drink an ounce or two at a share. 

However, as we've ramped up the mixed-ferm bottle release schedule (2019 - 8, 2020 -11, 2021 - 13, 2022 - 16, and hopefully ~20 in 2023) we occasionally have bottles to spare. Rather than distribute them locally, we've partnered with Tavour (which ships to many states).  They just released Homegrown Rule, a "Marylanbic" base with homegrown lemon verbena (from my yard) and pineapple sage (from Ken's garden). It's tart and snappy, with plenty of our house microbe character, augmented by the citrusy-green notes of the herbs. 


0 Comments

When it comes to brewing delicious beer, there are few aspects more important than the yeast. A healthy fermentation allows the malt, hops, and adjuncts to shine. Pitching the right amount of healthy cells helps ensure that the finished beer has the intended alcohol, expected residual sweetness, and appropriate yeast character.  

Over the last four years at Sapwood Cellars we've slowly improved our yeast handling. We've noticed improved fermentation consistency, and better tasting beers. Most of our process is excessive for a homebrewer, but it might give you some ideas!

Harvesting Yeast

We harvest yeast from moderate gravity beers when possible as these cells are less stressed and healthier as a result. Our general rhythm is to brew a pale ale with a fresh pitch, and harvest from that tank for an IPA and DIPA the following week. Once the pale ale fermentation is complete (repeated gravity readings, and no diacetyl or acetaldehyde sensory) we can and soft-crash to 56-58F (13-14C). Cold and dissolved CO2 encourage the yeast to settle out. Specific temperature and time are strain and tank dependent, but that works for most of the English-leaning strains we use (Boddington's, Conan, Whitbread, and the Thiolized-variants).

Once the beer has been cold for 24 hours, we attach a 1/2 bbl brink to the bottom of the tank and pasteurize through the line and brink with 180F (82C) water from our on-demand. 25 minutes hot ensures there aren't any stray microbes that will be passed onto the subsequent batches. After pushing out the water with CO2 pressure we spray the brink with cold water then pressurize it and the tank to ~10 PSI. 

We then dump about a gallon (4L) from the T until the yeast looks good (creamy, off-white) and then begin collecting into the brink. You don't need to dump a large volume of yeast. By keeping steady pressure on the tank and slowly releasing pressure on the brink through the valve at the top we ensure that the yeast won't come out of the cone too quickly (which could punch through pulling in more beer than yeast) and won't foam up in the brink. It takes 10-15 minutes to fill the brink. Usually we are able to collect 110-130 lbs (50-60 kg) before yeast starts coming out the top of the brink. 

We collect yeast before dry hopping to avoid having hops mixed in with the yeast. We also prefer the "less rough" flavor we achieve by dry hopping cold. If you dry hop early-mid fermentation and want to harvest, drop as much of the hops out as you can before crashing and harvesting.

Yeast Storage

Whenever possible we pitch within 72 hours of harvest. Larger yeast cultures generate more heat and thus tend to lose viability more rapidly. Store the yeast as cold as possible, which for us is ~36F (2C) in our walk-in. Ideally that would be closer to 32F (0C) to further slow its metabolism. Shake twice a day to dissipate hot-spots and vent down the pressure to knock-out CO2. If storing the yeast for more than a few days, attach a blow-off line to prevent pressure from building. 

There are studies about various additives for maintaining high yeast viability. We've added phosphate buffer to prevent a drastic pH drop. It's difficult to tell from a single data point, but viability dropped from 95% to 89% after a week of storage. We've seen closer to 10% reductions the handful of times we've stored yeast that long previously.  

We generally won't harvest and repitch beyond three generations (although recently we went to five). That's because with our limited number of tanks, variety of yeast strains, and canning schedule we'd eventually have to hold onto yeast for a couple of weeks before pitching or harvest from a strong beer. 

Determining Cell Count and Viability

There are plenty of successful brewers who pitch a standard weight by barrel/gravity, but knowing how many live cells you actually have is a great way to improve consistency. It's especially valuable if you use a variety of strains or want to bring in a new strain. Our harvests of the same strain can vary by as much as three times in terms of live cells per g of slurry (~.5-1.5 billion cells). The cost of all of the equipment required is ~$500, less than a single commercial 10 bbl yeast pitch from some labs. 

Start by shaking the brink to homogenize the culture. Then run a cup of yeast out, dump it (to avoid counting the cells packed around the port) and then pull a sample. The next step is to dilute the culture to a "workable" concentration - 1:100 for us. Too many cells packed together makes for a culture that is impossible/laborious to count, while too few raises the chances luck will throw-off the count. For a long time I diluted by volume, performing two sequential 10X dilutions with a micropipette. This had two drawbacks. First getting an accurate volume of yeast slurry is tricky because it is foamy and has small bits of trub that can plug-up the pipette. Second, we pitch by weight, so there was always some estimation when it came to converting the volume to a weight or the extra step of determining the physical density of the slurry by mixing with water in a graduated cylinder on a scale. What we do now is dilute by weight, which gives us cells per gram rather than cells per milliliter.

Our scale is accurate to .2 g, so weighing 1 g of yeast into 99 g of water has a ~20% margin of error. As a result I do 490 g of water with 5 g of the yeast slurry. This reduces the maximum margin of error to ~4%. After pouring the diluted culture back and forth to mix, I take 9.9 mL of the diluted culture with the micropipette and add .1 mL of a stock dye solution of Erythrosin B and phosphate buffer (1 g in 50mL of buffer). This results in a total dilution of 100X. You could go even further, a 10X dilution by weight (50 g yeast with 450 g of water) followed by a 10X dilution by volume (1 mL of the diluted culture with 8.9 mL water and .1 g of dye). Live cells are able to expel the Erythrosin B so they won't be stained, meaning any red yeast cells are dead. You can use a variety of other stains, but Erythrosin B is a food coloring and much safer to handle than methylene blue or trypan blue. Here's a post from Escarpmant Labs on using it inspired by my Tweet (which was in turn inspired by this).

Luckily the Boddingtons-type strain we use for most of our batches isn't "excessively" flocculent. When we fermented a run with Whitbread we ran into issues with the cells being too clumpy to count. Luckily BrewKaiser has a whole post on additions you can add to help. Phosphoric acid worked OK, but a local brewer suggested disodium EDTA, which I plan to buy before we do another run with a similar strain. 


Next, place a couple drops on the diluted culture a hemocytometer, apply the slide cover, and stick it under a microscope (we have an Omax). Count the live and dead cells in five squares (each made up of 25 small squares) - four corners, and center. This provides a large enough sample size to avoid undue randomness. A small tally counter helps keep track. The standard rule is to count cells touching the left and top lines, but not the right or bottom. Count connected cells as two only if the daughter cell is more than half the size of the mother. Then I plug the totals into Inland Island's Yeast Cell Count Calculator. Usually our harvests are 80-90% viable off a fresh pitch, and they tend to go up from there on subsequent generations (90-95%). If your viability isn't great it could either be that the yeast isn't getting enough nutrients/oxygen, your initial pitching rate was too high or low, or that you are waiting too long to harvest.  

There are automated solutions for yeast counting, but with some practice the whole processes will take less than 10 minutes.  


Pitching Yeast

To pitch, we attach the brink to a T inline during knock-out. With the brink on a scale we use CO2 to slowly push in the desired weight of yeast (calculated based on the cell count, wort gravity, and volume). We pitch during knock-out so the yeast mixes with the aerated wort as it goes into the fermentor. White Labs advocates using a pump to pitch their fresh yeast inline to achieve better mixing with the wort. Best practice is to do another cell count off the tank once knock-out is complete to validate your process (we did it a few times, but now trust our approach).

When we started brewing more double batches to fill our 20 bbl tanks, we were pitching enough cells for 20 bbls along with the first 10 bbls of wort. Our thought process was that the yeast wouldn't do much in the 3-4 hours before the second half of the wort went in. However, we found our fermentations were less reliable, often dragging towards terminal gravity, and the yeast from those batches had much lower viability than expected. Both of these issues improved significantly once we switched to pitching only enough cells for the initial knock-out volume. This allows for more growth and thus a higher proportion of younger yeast cells. 

Hopefully this overview of our process is helpful for someone starting a new craft brewery, or looking to take their yeast management to the next level. As with anything in brewing, the more variables you can track and control the more consistency you'll have in your results. Yeast management isn't a "fun" topic, but it is one of the simplest things a brewery can do to increase consistency, improve flavor, and save money!


0 Comments
This week I take a look at some of the new hop products and forms of hops available to professional and home brewers. We’re fortunate to live in an era of hop forward beers, and brewers have a wide variety of products available to create great beers. Dried Hop Forms The vast majority of hops […]
0 Comments
This week I wanted to share a more detailed look at the upcoming Web based version of BeerSmith which is scheduled for release in June of 2021. It will be available to all Gold+ license holders of BeerSmith 3. When released, you can simply log into your existing BeerSmithRecipes.com account and edit recipes in your […]
0 Comments
This week I cover mead making fermentation and finishing. Last week in part 1, I provided an overview of mead making and the first steps of making the must, pitching your yeast and adding nutrients. This week I will cover the remaining steps. As I covered last week the key components of modern mead making […]
0 Comments

When The Virginia Beer Company’s management team made the executive decision on 3/16/2020 to close their taproom and shift entirely to curbside to-go operations, there was no precedent for how to plan for the future of the business. But one focus remained clear: do everything possible to keep every member of the Virginia Beer Co. […]

The post Virginia Beer Co. Completes Brewery Expansion Projects Ahead of 5-Year Anniversary appeared first on CraftBeer.com.

0 Comments
This week we take a look at some alternative strategies for adding nutrients to your mead for proper fermentation. I also explain the TiONSA and TONSA 3 models which are implemented in BeerSmith. Staggered Nutrient Additions A key part of modern mead making techniques is the staggered addition of mead nutrients. Prior to the adoption […]
0 Comments

The Virginia Beer Company (Williamsburg, VA) will mark the holiday season with the return of their seasonal Spiced Milk Stout, Evil Santa. “Since the first winter we were open back in 2016, Evil Santa has been one of our most sought after recipes,” reminisces Co-Founder Robby Willey. “The branding is playful, the time of year […]

The post Virginia Beer Co. Releases Four Evil Santa Spiced Milk Stout Variants appeared first on CraftBeer.com.

0 Comments
I’m happy to announce the BeerSmith Mobile 3.1.9 update has been released for Android, iPhone/IOS and the Amazon app store. The app is being released on an “rolling” basis to existing users or via the app store over the next week. More Value, Costs Less The new BeerSmith Mobile release is a significant improvement over […]
0 Comments
Today I’m going to highlight some of the new dry hop features in BeerSmith 3.1. BeerSmith 3.1 was released in mid-2020. Dry hopping is one of the best ways to preserve aroma oils in your hops. Because it is done at low temperature, you don’t risk boiling off volatile aroma oils. Also the long contact […]
0 Comments
Buy BeerSmith 3 Download BeerSmith 3 Here is a summary of the new features coming in the BeerSmith 3.1 desktop update. I have posted the open beta version on the main download page at BeerSmith.com, and plan to publish the formal release in the next week or two. You can find additional details for all […]
0 Comments
There are so many reviews of homebrewing gear online, but when it comes to craft brewing equipment you're lucky if you can find a forum post or two. It makes sense as there are so many more homebrewers than craft brewers... I also had more time to write before I started making beer 60+ hours a week. Now that we're a year into brewing at Sapwood Cellars, it seemed like a good time to step back and get my thoughts down about the equipment we purchased. Hopefully what follows will help a brewer starting out, looking to add something, or just wanting a sense of what things cost.

Forgeworks 10 bbl Brewhouse - $71,306

The Good: Reasonable price, solid build quality, gets the wort production job done.

The Bad: A few design head-scratchers on the mash tun. It has a huge volume below the false bottom (~90 gallons/3 bbl). The under-screen spray balls spray directly into the supports making them useless (the connection for them is also around back making it difficult to access). The torsion ring on the rakes wasn't adequately tightened when we received it causing the rakes fell off mid-mash a few batches in. No issues since properly tightening. Originally the pickup arm in the kettle extended into the center (right into the trub cone), but they swapped us our for a shorter one that is now standard.

Verdict: Satisfied with it so far, but not thrilled given things like having to pull the false bottom to clean underneath/between after the last brew of the week (the plates can be annoying to remove, but not bad compared to some other systems).

10 bbl Forgeworks Brewhouse

MidCo EC300 Burner - $1,070

The Good: Plenty of heat to have the kettle close to a boil by the time run-off is finished.

The Bad: The burner's control board is incredibly sensitive to moisture, just a few drops and it is fried. A fact that it would have been nice to have a warning about from Forgeworks (they said some breweries have had it happen multiple times). Otherwise it has just been a learning curve to wait longer to turn it on and throttle the gas to avoid boil-overs. Our beers are 1-2 SRM darker than predicted thanks to direct fire, but not really the burner's fault.

Verdict: Steam would have been great, but wasn't in our budget. We haven't had issues since covering the control board with a plastic baggie (we've got a spare controller too). We were told that MidCo had a waterproof housing almost complete last fall, but haven't heard an update since.

MidCo EC300 Burner

Thermaline Heat Exchanger - $4,198.72

The Good: Their website allow you to input the parameters (volume, desired chilling rate, ground water/glycol temperature) and they build a unit to accommodate. That seemed to work for us as the chill times seem to line up reasonably.

The Bad: Nothing major to complain about. In the summer we do have to slow run-off as the second stage (glycol) doesn't lower the temperature compared to ground water by more than a degree or two at full blast.

Verdict: Might have been worth it to go a bit more over-sized, but no issues with the build-quality, durability etc.

Thermaline Heat Exchanger

Apex 10/20 bbl Fermenters - $7,500/10,700

The Good: The price is reasonable. We've got the "new style" 10 bbls that have an easy-rotate racking. The 2 inch dumps at the bottom rarely get clogged with hops, and the 4 inch dry hop ports work well, especially with our hop doser (below).

The Bad: The 20 bbl tank is the "old style" meaning the racking arm is just a tri-clamp. Not ideal, but it works fine especially after switching to a Teflon gasket. The big issue on that tank is with the hop port, the literature said it was a 6 inch, but it turned out to be a DIN150 (European fitting). Apex had been aware of this for 6 months and it took me ordering a gasket (to confirm the size), a custom reducer, and a new clamp all from Sanitary Fittings to resolve the issue.

There is a minor issue with one of the 10 bbl fermenters as well, the sparyball arm is just a little short which makes reassembly a two person operation (one to push, one to clamp).

Verdict: Given the issues and poor service with the 20 bbl, I'm hesitant to order more tanks from them when the time for expansion comes. Especially as they don't manufacture the tanks, the only advantage of going with them rather than directly from a Chinese manufacturer would be service.

Apex 10/20 bbl Fermenters

Colorado Brewing Double Keg Washer - $6,370‬

The Good: Great price for an semi-automated keg washer. It rinses, washes, sanitizes, and purges two kegs at a time without intervention. As long as everything is connected and the reservoirs are filled, we rarely have an issue (other than hops in the occasional keg plugging up). The cycles are customizable, so we've tweaked them. We run a double cycle on our sour kegs, and no issues so far sharing them with clean beers.

The Bad: It's been a bit of a chore to deal with the issues that have arisen in one year of use: casters fell off, weld on one of the pots failed, software "disappeared", gas solenoid failed etc.

Verdict: The company has been great at dealing with these issues as they've occurred, shipping us replacement parts, paying for a welder etc. That said, I'd rather have not spent so much time dealing with it.

Colorado Brewing Double Keg Washer

Marks Mini-Hop Doser - $495

The Good: Allows us to add hops with minimal oxygen pick-up. Safer than dry hopping loose (no risk of foam-up). Ability to add hops to a tank without venting the head pressure.

The Bad: Nothing big, although expect to double the cost of the unit itself in fittings. We have 4 inch butterfly valves on our tanks and move the doser between them as needed.

Verdict: Not sure what we'd do without it... oh I do because we we're able to use it on our 20 bbl because of the wonky port size (run CO2 and hope you don't get a face full of beer).

Marks Mini-Hop Doser

Navien Tankless Water Heater Standard Model - $1,260

The Good: Outputs up to 180F, plenty hot for collecting water for the mash and sparge or pasteurizing a line. Relatively inexpensive to buy and operate compared to a traditional always-on HLT.

The Bad: In the winter 180F output runs at 3 gallons/min. Helps to have a tank with an electric element to speed things up, or pre-collect water the night before.

Verdict: At our scale, and without steam this made the most sense and we're still happy with it. Two units can be daisy-chained together if we want to speed things up (e.g., first heats to 140F, second to 180F).

Navien Tankless Water Heater Standard Model

Uline Straddle Stacker: Semi-Electric - $3,245

The Good: It's considerably less expensive than even a used propane-powered forklift. It's good in tight spaces because it's human powered, and powerful enough to lift a rack with two barrels. Being electric, it doesn't produce fumes that could negatively effect barrel-aging beers.

The Bad: Given the legs in front, it can't get around larger pallets, or standard pallets the long way.  It is propelled by pushing, and weights over 1,200 lbs (plus whatever you are moving up to 2,200 lbs more). Only one wheel turns with steering making direction changes difficult. It also needs additional height above it, which can be tricky in a building with HVAC, lights, doorways etc.

Verdict: With our relatively cramped space, a forklift doesn't make sense, this gets the job done.

Uline Straddle Stacker: Semi-Electric

FlexTanks - $460-$1,190

The Good: They are inexpensive compared to stainless steel totes, while being easier to use than IBCs (international bulk containers). They have standard 1.5" tri-clamp fittings and sample ports. We mainly use the 300 gallon ones to hold bulk sour beer waiting for barrels, or to dilute barrel-aged beer that is too oaky (especially with so many first-use barrels). The 80 gallon FlexTanks are for fruit additions, where the large opening makes them easier to fill and empty than a barrel.

The Bad: They can only take ~1 PSI, so most of the movement has to be from gravity. The gasket on the lids is round and doesn't have a grove to sit in. This makes it is difficult to align without dropping in.

Verdict: They were a good place to start thanks to the price, but stainless would be more versatile and foolproof if you have the money.

300 gallon FlexTank

EuroTransport Container Dimple Jacketed - $6,595

The Good: It's a movable, stainless-steel, temperature-controlled tank. We use it as our blending tank for sour barrel-aged beers. The bottom port is for liquid in/out (with a T for the sample port), and the two side ports for the temperature probe and carbonation stone. We currently have it off the pad, so it is nice to be able to pallet-jack it onto the pad for cleaning.

The Bad: It's odd that a jacketed tank doesn't have a built-in thermowell for the temperature probe. We use corny fittings for some kegs anyway, but it is weird to have a tank like this with a gas poppet on top. While the tank is jacketed, it isn't double walled so it sweats like crazy in the summer, we need to insulate it.

Verdict: Reasonably happy with it, but it requires a bit of a unique situation (like ours) to justify this over a standard brite tank.

EuroTransport Container Dimple Jacketed

XpressFill XF4500 - $6,295

The Good: It's a reasonable price for a four-head counter-pressure bottle filler. Does four bottles a minute when everything is humming along.

The Bad: We had some issues early on with the fill sensor. One or two heads would indicate that the bottle was filled even when it was empty. Turned out it was a drop of condensation on the CO2 line "falsely" completing the circuit. Not a problem now that we know what to do. One of the switches won't stay in the off position, which can cause the pneumatic foot to rise unexpectedly.

Verdict: I'm happy with it. Worth the added cost over a gravity filler for us because it reduces oxygen exposure, and allows us to bottle partially (or fully) carbonated beer. Our general approach is to chill the beer in the blending tank, prime with sugar and rehydrated yeast, agitate the tank, then pump in CO2 through the stone to get to ~1.5 volumes of CO2. The yeast does its job to bring the carbonation to target in the bottle, and we don't have to worry about predicting residual CO2 in barrels stored in ambient conditions.

Update: We had to cut down the stoppers to lower the fill heights which were ~17.4 oz in our 16.9 oz bottles. That seemed to work well.

XpressFill XF4500


0 Comments
Cleared by the final runnings.

My homebrewing-rate has slowed dramatically the last couple months, not coincidentally we brewed our first batch at the brewery around that time (House Saison brew day). Part of that is brewing 10 bbls about twice a week, the rest is how much time I spend at the brewery doing other stuff. My plan for The Mad Fermentationist is to keep up the same style of post, with recipes and tasting notes for occasional Sapwood Cellars beers. I'll still document homebrew batches when I can, mostly test batches or experiments with impractically weird ingredients.

The first beer I wanted to cover is my favorite of the initial four clean batches, Rings of Light. For those interested the name, is a subtle The Fellowship of the Rings reference: "They watched the pale rings of light round his lanterns as they dwindled into the foggy night." It is exactly the sort of beer I love drinking, moderate alcohol (4.8% ABV), but with a huge hop flavor and aroma and a surprisingly luscious mouthfeel. Luckily Untappd reviews have been pretty positive, and it is our tasting room's top seller so far!

You'll likely recognize most of the elements of the recipe as things Scott and I have been doing for years. Golden Naked Oats, Chit malt, Boddington's yeast (RVA Manchester), moderate-high chloride and sulfate, less expensive hops in the boil (Cascade and Columbus), and Citra dry-hopping. We added mid-late fermentation additions to several of our other batches, but this one was soft-crashed to 58F before dry hopping so we could harvest the yeast for re-pitching into an IPA (Cheater Hops) and DIPA (Uncontrollable Laughter). 

Scott dry hopping Rings of Light.

The process tweaks have mostly been to account for the differences related to the physics of working at scale. For example, usually I'd add a small dose of hops at 15 minutes to up the bitterness, but in this case the extended contact after flame-out makes that unnecessary (between whirlpool, settling, and run-off near-boiling wort is in contact with hops for more than a hour). In fact, we added one barrel of cold water at flame-out to lower the whirlpool temperature to reduce isomerization. Beersmith 3 includes the capability to specify the average temperature of the wort during the whirlpool, still the estimate seems to be wildly higher than the perceived bitterness. I wonder if the hops settling, mixing with the proteins in the trub-cone slows the isomerization rate?

It has taken a little time to dial in our Forgeworks brew house. We achieved slightly lower efficiency and attenuation on this batch than expected for example. We've made a few mistakes and miscalculations along the way, but given neither of us had brewed frequently at a commercial scale I'm happy to report that things have been relatively smooth. Our biggest issues have been with the durability of the equipment itself. For example the rakes in the mash tun detached from the motor twice, and our burner shorted after a boil-over. What is taking the most effort to optimize is our cleaning and sanitation regimen. 

Kegging pale ale.

Thanks to everyone who came out to our grand opening last weekend! I didn't expect as many fans of the blog to drive from an hour or more away to try the beers and say hello. Either Scott or I will be there most of the time we're open, so let us know! Happy to show you around and talk brewing. For those further away, I'm also running the brewery's Twitter and Facebook accounts for now (Scott took Instagram because I couldn't figure it out).

Rings of Light in the tasting room.

Rings of Light

Smell – Pleasantly mango-melon hop aroma. As it approaches room temperature I get a slightly toasty-vanilla-richness thanks to the yeast playing off the Golden Naked Oats. Otherwise a pretty clean/fresh aroma.

Appearance – Pleasantly hazy yellow, glowing in the right lighting. I guess we did an adequate job avoiding oxygen pickup during transfers and kegging as it hasn’t darkened! We certainly pulled some hop matter into the bright tank, but it mostly settled out and stayed behind when we kegged, as I don’t see any particulate in the pour. Head is really thick, but could have better retention.

Taste – I really love the flavor on this, really saturated with juicy hops. Similar to the aroma, the tropical flavors from the Citra dominate the Cascade and Columbus. We were surprised how hop-forward it was even before dry hopping (perhaps thanks to the deep kettle slowing the evaporation of the oils?). Bitterness is pleasant, but restrained. Well below the estimated 70+ IBUs, more like 40-50 to my palate.

Mouthfeel – Full bodied, especially for a  sub-5% beer. That is thanks to the oats, and low attenuation (which allowed for more malt for the given alcohol). As usually the substantial texture of the head from the chit malt really enhances the perception of creaminess.

Drinkability & Notes – Glad this beer ended up as an early-fall release. It is a little full for a quenching summer pale ale, but it is perfect for temperate weather. The hops are well balanced, and provide enough interest to demand each additional sip. The malt mostly stays hidden, while providing adequate support.

Changes for Next Time – We’ve already got a new batch of this fermenting with the same grist and kettle-hops, although given the tweaks (higher original gravity and different yeast: Lallemand New England and S-04) it may receive a different name.

Recipe

Batch Size: 315.00 gal
SRM: 4.9
IBU: 73.7
OG: 1.052
FG: 1.018
ABV: 4.8%
Final pH: 4.54
Brewhouse Efficiency: 68%
Boil Time: 60 Mins

Fermentables
-----------------
75% - 495 lbs Rahr 2-Row Brewer's Malt
16.7% - 110 lbs Simpsons Golden Naked Oats
8.3% - 55 lbs Best Chit Malt

Mash
-------
Mash In - 60 min @ 153F

Hops
-------
11 lbs Cascade (Pellets, 7.20% AA) - Steep/Whirlpool 75.0 min
11 lbs Columbus (Pellets, 15.70% AA) - Steep/Whirlpool 75.0 min
22 lbs Citra (Pellets, 12.00% AA) - Dry Hop Day 10

Other
-------
40 g Whirlfloc G @ 15 mins

Water
-------
200 ml Phosphoric Acid 75% @ Mash
1.00 lb Calcium Chloride @ Mash
0.70 lb Gypsum (Calcium Sulfate) @ Mash
50 ml Phosphoric Acid 75% @ Sparge

Calcium
Chloride
Sulfate
Sodium
Magnesium
Carbonate
120
150
100
20
5
100

Yeast
-------
RVA Manchester Ale #132

Notes
-------
Brewed 8/29/18

Collected 315 gallons of water.

All salts and 100 ml acid right after mash-in. Ran rakes for 15 minutes, started recirculation 10 minutes after mash in. After 10 min of recirculation, measured temp at 152.8F.

Measured mash pH at 5.42, add 50 mL more acid. 5.39, add 50 mL more acid. 5.34.

Sparge water 183F, pH 6.47 with acid addition - more next time

Start of boil with 11 bbls of 1.055 runnings.

Added 1 bbl of cold water at the start of the whirlpool. Combined temperature 196F, added hops.

Run-off started at 66F. .5L/min of O2 through in-line stone.

Ended up with a wort temperature of 64F. Set tank to to 66F. By the next morning the glycol chiller had popped the breaker and the tank was at 69F... Reset and lowered to 67F.

8/31 Raised set-point to 69F to ensure finish.

9/3 Fermentation appears nearly complete from lack of CO2 production. Tastes good, better hop aroma than expected. Up to 70F to ensure it is done before soft crashing.

9/6 Harvested yeast. Left blow-off open so no dissolved CO2.

9/7 Dry hopped with 22 lbs of Citra through the top port while running 25 PSI of CO2 and blow-off arm closed. Closed everything and add 5 PSI as head pressure.

9/8 Pushed 15 PSI through racking arm for 1 minute to rouse, 18 hours after dry hopping. Dropped temperature to 54F.

9/9 Pushed 15 PSI through racking arm for 1 minute. Dropped temperature to 50F.

9/10 Crashed to 36F.

9/12 Moved to bright tank. 3 L/min of CO2 set to 16 PSI got to ~11 PSI at 36 F. 2.6 volumes of CO2 prior to kegging.

9/15 Kegged, 17 kegs with the last almost full.

I get a commission if you buy something after clicking the links to MoreBeer/Amazon/Adventures in Homebrewing/Great Fermentations!
0 Comments
Split Test Batch Rye

I have nothing against brewing to-style. You can make magnificent and delicious beers by using ingredients from a single region with the goal of a classic balance. That isn't who I am as a brewer though. The recipe for Sapwood Cellars' False Dragon is the sort that I'm passionate about. We selected ingredients from all over the globe to create a flavors and aromas that aren't authentic to any one tradition. What I wanted was an earthy-crisp malt flavor, a white-winey hop aroma (for less money than Nelson Sauvin), and a subtle spicy and fruity-boost from the yeast without getting in the way. That required malts from America and England, hops from America and Germany, and yeast from England and Belgium.

Scott adding Centennial hops to the whirlpool

I'd been experimenting with the hop bill for a few months to get the ratio right, and eventually settled on 2:1 in favor of Mosaic. After a few test batches, Scott and I have embraced adding less expensive hops on the hot-side (Cascade, Columbus, Chinook, Centennial etc.) with the more aromatic and expensive varieties saved for the fermentor. I wanted to split my homebrewed test batch to compare S-04 alone against S-04 with 8% T-58. As with Ziparillo, dry yeast is cost-effective especially if you can't repitch thanks to early or mid-fermentation dry hopping. Belgian strains have shown heightened biotranformation abilities is some studies, so it seemed like a good candidate for double dry-hopping.

Dry yeast pitched into a 10 bbl batch

For the 10 bbl batch we decided to fill-in a gap in our range when the first batch of Rings of Light (our Citra dry-hopped hazy pale ale) came in under-alcohol at 4.8% thanks to lower-than-expected efficiency. In effect the two recipes switched places with False Dragon becoming the "bigger" pale ale at 5.3% rather than the 4.7% of the test batch. Our attenuation has been lower than expected across the board for our first five batches too. We're still trying to figure out the cause given it has happened with multiple yeast strains - likely mash related. Luckily our hop flavor and aroma have both been wildly better than either Scott or I have been able to achieve at home, I'm sure surface-to-volume ratio plays a role.

Your first chance to try this beer is at the Sapwood Cellars grand opening, Noon-10 PM on Saturday 9/29. We'll be open Thursday-Friday 4-10 PM and Saturdays Noon-10 PM from then on. Stop in, drink a beer, say hello!

The name False Dragon come from The Wheel of Time series of books by Robert Jordan. My commute has gone from 20 minutes on the subway to my desk job to ~40 minutes by car. Audio books are my new friend. While I'm sure brewing podcasts would be a more productive use of my time, after 12 hours brewing it is nice to have a little escapism.

Test batch False Dragon with S-04

False Dragon S-04

Smell – Had to go for a fresh pour after taking photos as it had gone a hint skunky after five minutes in the sun… Nose is a fresh “true” hop aroma to the Mosaic and Hallertau Blanc. White wine, but also some blueberry and green/herbaceous. Certainly Nelson-reminiscent, but a unique character as well.

Appearance – Pale yellow, pleasantly hazy. Good head and lacing, but the foam itself feels airy on the tongue. I guess I’ve gotten used (and miss) to the contribution of chit malt.

Taste – A firm amount of bitterness in the finish, but it doesn’t linger. Light and bright with the tropical-fruity hops starring. Rye doesn’t really make a strong showing, although I’ve always found it more subtle than some others taste.

Mouthfeel – The rye helps prevent it from being watery, but it is a summery pale ale. Glad we ended up a little higher OG/FG on the big batch. Medium carbonation, nice for a lighter beer.

Drinkability & Notes – A pleasant session IPA. The Mosaic and Hallertau Blanc work better together than apart.

Changes for Next Time – 10% chit in place of the base malt wouldn’t hurt. Could certainly up the rye too for a bigger contribution.

Test batch False Dragon with S-04 and T-58

S-04 and T-58

Smell – More rounded, less grassy-distinct hop aroma. Tropical, juicy, inviting. The green flavors are now more honeydew melon. Impossible to say how much of that is actual hop chemical reaction, or synergistic between the hops and esters. Lightly bready.

Appearance – Looks similar in terms of head, color, and clarity.

Taste – Lower perceived bitterness. A more saturated/integrated fruity hop flavor. Passionfruit especially. I think this is the more approachable and interesting beer, and distinct from the other English-only fermentation we are doing (using RVA Manchester). Slightly elevated phenols, but much lower than from the WB-06 in Ziparillo.

Mouthfeel – Slightly creamier (perhaps just the lower perceived bitterness?), identical carbonation.

Drinkability & Notes – I was able to identify these pretty easily in a blind tasting. It is amazing how much impact such a small amount of yeast can make.

Changes for Next Time – We decided to back down the T-58 4.4% of the blend to allow a bit more of that fresh/distinct hop character through. Other than the higher gravity, the recipe was otherwise unchanged for the 315 gallon batch! We’ll probably up the rye for batch #2 now that we know we can handle higher percentages of high beta-glucan huskless grains.

False Dragon - Test Batch

Batch Size: 11.00 gal
SRM: 4.1
IBU: 30.0
OG: 1.046
FG: 1.012/1.012
ABV: 4.7%
Final pH: 4.43/4.49
Brewhouse Efficiency: 72%
Boil Time: 60 mins

Fermentables
-----------------
75.6% - 17 lbs Rahr 2-Row Brewer's Malt
14.4% - 3.25 lbs Briess Rye Malt
10.0 % - 2.25 lbs Crisp Floor Malted Maris Otter

Mash
-------
Mash In - 45 min @ 156F

Hops
-------
8.00 oz Centennial (Pellet, 7.20%) @ 30 min Steep/Whirlpool
6.00 oz Mosaic (Pellet, 12.25%) @ Dry Hop Day 3
3.00 oz Hallertau Blanc (Pellet, 10.50%) @ Dry Hop Day 3
6.00 oz Mosaic (Pellet, 12.25%) @ Dry Hop Day 7
3.00 oz Hallertau Blanc (Pellet, 10.50%) @ Dry Hop Day 7

Other
-------
1 Whirlfloc Tablet @ 5 mins

Water
-------
18 g Calcium Chloride
12 g Gypsum (Calcium Sulfate)
6 tsp Phosphoric Acid 10%

Calcium
Chloride
Sulfate
Sodium
Magnesium
Carbonate
150
150
150
15
10
90

Yeast
-------
11.5 g SafAle S-04 English Ale
or
11.5 g SafAle S-04 English Ale
1 g SafBrew T-58 Specialty Ale

Notes
-------
Brewed 8/19/18

Mash pH = 5.44 (at mash temp) after acid additions.

Collected 14.5 gallons of 1.046 runnings.

Added heat to maintain a whirlpool temperature of 200F.

Chilled to 64F. Half with 1 g of T-58 and 11 g of S-04, and half with only 11 g of S-04. Left at 62F ambient to begin fermentation after shaking to aerate.

69F internal temperature during peak fermentation.

8/22 Dry hopped each with 3 oz of Mosaic and 1.5 oz of Hallertau Blanc.

8/27 Second dry hop for both.

9/1 Kegged both, 1.012, moved to fridge to chill.

9/2 Hooked up to gas and tapped to remove sludge. S-04 batch clogged poppet a few times.

I get a commission if you buy something after clicking the links to MoreBeer/Amazon/Adventures in Homebrewing/Great Fermentations!

Brite tank sample of False Dragon

0 Comments
There are a lot of IPA drinkers out there, but I get the feeling that there are just as many people who would enjoy the fruity-tropical flavors in New England IPAs, but were scared off by the IBU-arms-race of earlier this decade. I wanted to develop a session beer for Sapwood Cellars that showcases fruit-salad hoppiness without assertive bitterness. Sort of a Belgian white, with hops instead of spices. The result is a beer we're brewing 10 bbls of today... Ziparillo!

Dry hopping mid-fermentation is a great technique for chasing away raw-green hop aromatics that turn-off some drinkers. The problem is that adding hops early makes harvesting yeast far more difficult. Our solution was to use dried yeast. For a fraction of the price of a liquid pitch (~$60 for 500 g dried) it means we don't feel bad not cropping and repitching. Dry yeast also allows for easy strain blending by weight. In this case the test batch was 85% S-04 and 15% WB-06. The goal was to support the fruity hops with a little banana from the hefeweizen strain. An idea I first tried in my American Oat Ale.


The grist is a callback to what we developed for Modern Times Fortunate Islands, still my favorite of their regular offerings. The grains were in turn inspired by Three Floyds Gumballhead. We decided to go a bit lighter on the wheat until we get used to how large amounts of huskless grains lauter on our Forgeworks brewhouse. Hot-side hopping is a single dose of Cascade in the whirlpool. A classic variety with a good blend of oils, but without excessive alpha acids (or cost). Despite that, for the up-scale we're going to lower the whirlpool temperature to ~195F with a barrel of cold water at flame-out to keep the IBUs under 20. Dry hopping with Amarillo for stonefruit aroma.

Hefeweizen yeast, CaraVienna, Cascade, and Amarillo is a combination I tried back in 2010 for this Hoppy Hefeweizen. Not the same intended balance on that batch, but a similar palate of flavors.


The wrinkle in this test batch was that I split it pre-boil. I've been editing Scott's draft for "The New IPA" and the research suggested that many hop oils peak very quickly at higher temperatures and then dissipate. So I split the batch, half with a 20 IBU addition at 60 minutes followed by a flame-out addition immediately after turning on the immersion chiller. The other half I added a hop-stand/whirlpool addition allowing it to sit for 45 minutes before starting the chill. I even left the heat on low to better replicate the slow cooling of a commercial-scale whirlpool.

Going in I was suspicious. I'd changed from quick-chilling to hop-stands a few years ago, and felt that my beers had gotten a better more saturated hop flavor. The beers came out surprisingly similar, but not exactly the same.

Ziparillo - Quick Chill

Smell – Clean yeasty-doughy nose. Banana. Cascade grapefruitiness shines through as the dominant hop character. Certainly reminds me most of hoppy hefeweizens that I’ve brewed previously. Surprising how much yeast character there is from a low percentage of WB-06.

Appearance – Pale-gold, mildly hazy of the standard hefeweizen type. Not milky-haze. Good head retention and cling.

Taste – Bitterness is present, a bit higher than 20 IBUs in my estimate. Crisp finish with some lingering hop resin. Amarillo comes in a bit towards the end, apricot. Odd that I get the kettle hops in the nose and the dry hops in the flavor. The quick chill seems to have imparted a more dry-hop like character. Dry, with a finish that reminds me of some sort of herbal spritzer?

Mouthfeel – Snappy, good firm carbonation, but not as high as a traditional hefe. Dry, slightly tannic finish.

Drinkability & Notes – A nice session beer. The polyphenols from the early-boil addition may be making the bitterness come-across higher than the calculated IBUs would suggest.

Changes for Next Time – Drop the bittering addition to 10 IBUs, and this would be much closer to the balance I was looking for. Nice as is, but likely too bitter for many hop-phobes. Yeast character is a bit distracting.

Ziparillo - Hop Stand

Smell – Similar, but the yeast character comes across as leaning more bubblegum than banana. Slightly more phenolic as well, peppery. Hops are better integrated into the yeast character or maybe just less assertive. I get honeydew melon.

Appearance – Identical. In this case the timing of the boil hops and speed of chilling doesn’t seem to have effected clarity.

Taste – Bitterness seems lower/smoother, and the finish rounder despite the same calculated IBUs. Like the nose the line between fruity yeast and hops is less distinct than the other version. There is more banana than in the nose, but it is still relatively subdued. Hops are bright and citrusy.

Mouthfeel – Smoother, less tannic. Coating compared to the other half. That isn’t a character that necessarily sounds beneficial to a session beer, but in this case it makes it easier and more pleasant to drink.

Drinkability & Notes – Closer to what I was looking for, the hops and yeast meld together into a pleasant fruit salad. Rather than a generic fruitiness throughout the effect is different flavors from nose and mouth, evolving as it warms. One friend noted that it has sort of an Allagash White thing going on, which was exactly my intent.

Changes for Next Time – We’ll be cutting the WB-06 from 15% to 7.5% in the big batch. The taller fermentor should suppress ester production as well. We’ll add a barrel of cold water at the end of the boil to lower the temperature and further smooth the hop bitterness contributed by the whirlpool addition.


Recipe

Batch Size: 12.00 gal
SRM: 4.8
IBU: 18.3
OG: 1.048
FG: 1.008
ABV: 5.25%
Final pH: 4.60
Brewhouse Efficiency: 72%
Boil Time: 60 mins

Fermentables
-----------------
68.2 % - 15 lbs Rahr 2-Row Brewer's Malt
22.7 % - 5 lbs Briess Red Wheat Malt
6.8 % - 1.5 lbs Briess Caravienne
2.3% - .5 lbs Rice Hulls

Mash
-------
Mash In - 45 min @ 158F

Hops
-------
V1
1.00 oz Cascade (Pellets, 5.5% AA) @ 60 min
3.50 oz Cascade (Pellets, 5.5% AA) @ Flame-Out
2.00 oz Amarillo (Pellets, 9.2% AA) @ Dry Hop Day 2

V2
3.50 oz Cascade (Pellets, 5.5% AA) @ Whirlpool 45 min
2.00 oz Amarillo (Pellets, 9.2% AA) @ Dry Hop Day 2

Other
--------
1 Whirlfloc Tablet @ 5 min

Water
-------
18.00 g Calcium Chloride
5.50 g Gypsum (Calcium Sulfate)
9.00 tsp Phosphoric Acid 10%

Calcium
Chloride
Sulfate
Sodium
Magnesium
Carbonate
140
170
100
15
10
90

Yeast
-------
22 g SafAle English Ale S-04
4 g Safbrew Wheat WB-06

Notes
-------
Brewed 8/5/18

5.28 at mash temperature after all additions (~5.5 corrected to room temperature).

Split between two boils:

1. 1 oz of Cascade @60 min, and 3.5 oz of Cascade with a quick chill at flame-out (added hops right after starting IC).

2. 3.5 oz of Cascade with a whirlpool at 212F (with heat) for 45 minutes... mostly stayed 190-200F.

Chilled to 68F, pitched 1 pack of S-04 and 2 g of WB-06 into each (no rehydration). Shook to aerate.

Same fermentation, beer temp 65F.

8/7/15 Dry hopped ~36 hours after pitching. Set beer temp to 68F to continue fermentation.

Kegged 8/16/18

I get a commission if you buy something after clicking the links to MoreBeer/Amazon/Adventures in Homebrewing/Great Fermentations!
0 Comments